
Setup Offline Wallet
A basic HYDRA transaction is composed of three steps:
Compose the base transaction: from, to, amount, fee.
Sign the transaction using the private key.
Transmit the signed transaction to the network.
"Safe Send" isolates these steps between two computers/wallets, where steps 1 and 2 is performed with an offline wallet of which the private keys are never exposed to the internet. The web wallet "Safe Send" walks through these 3 steps to make a very safe transaction using the offline wallet.
Setup Offline Wallet
For a Safe Send, first set up the offline wallet by getting a copy of the web wallet and browser software. This example will use Google Chrome on Windows, and you can adjust to your preferred browser and operating system.
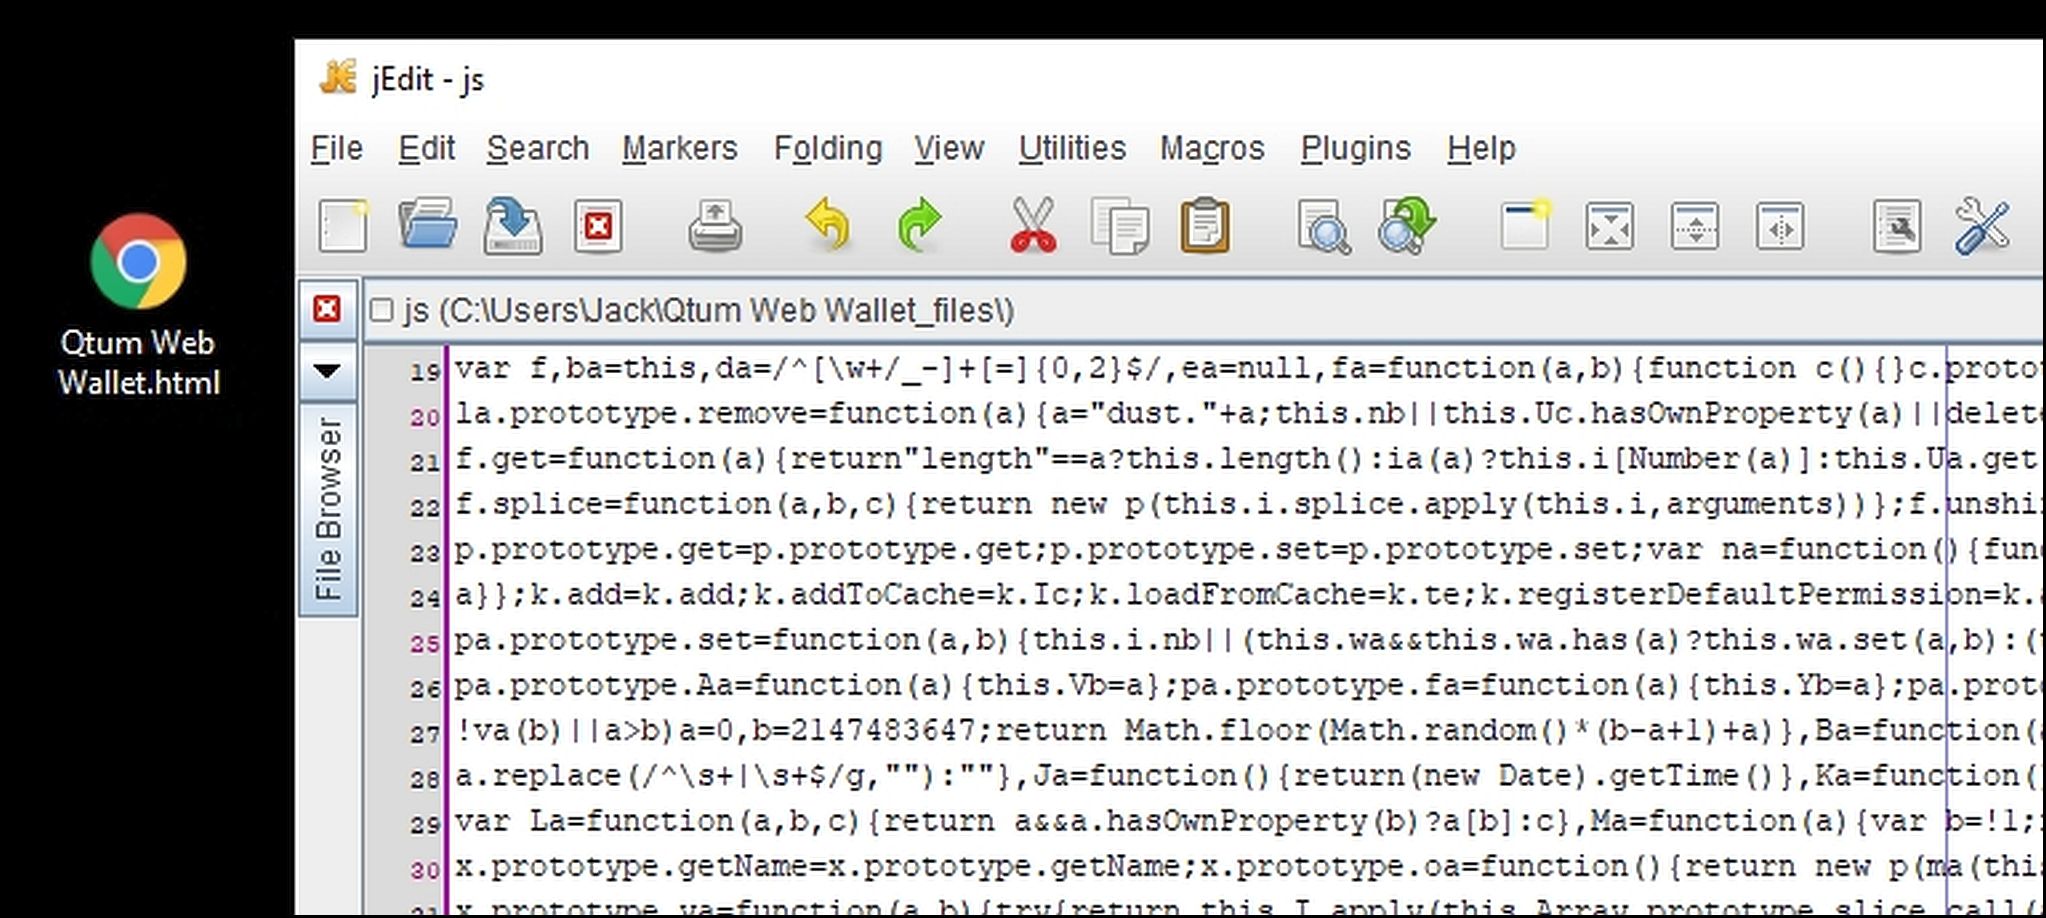
On the online computer, using the Chrome browser, go to https://webwallet.hydrachain.org/. In the browser upper right-hand corner select the three vertical dots for menu, select More tools then Save page as… to save the Hydra Web Wallet HTML file. This file contains all the JavaScript code to run the web wallet:
The Web Wallet HTML file
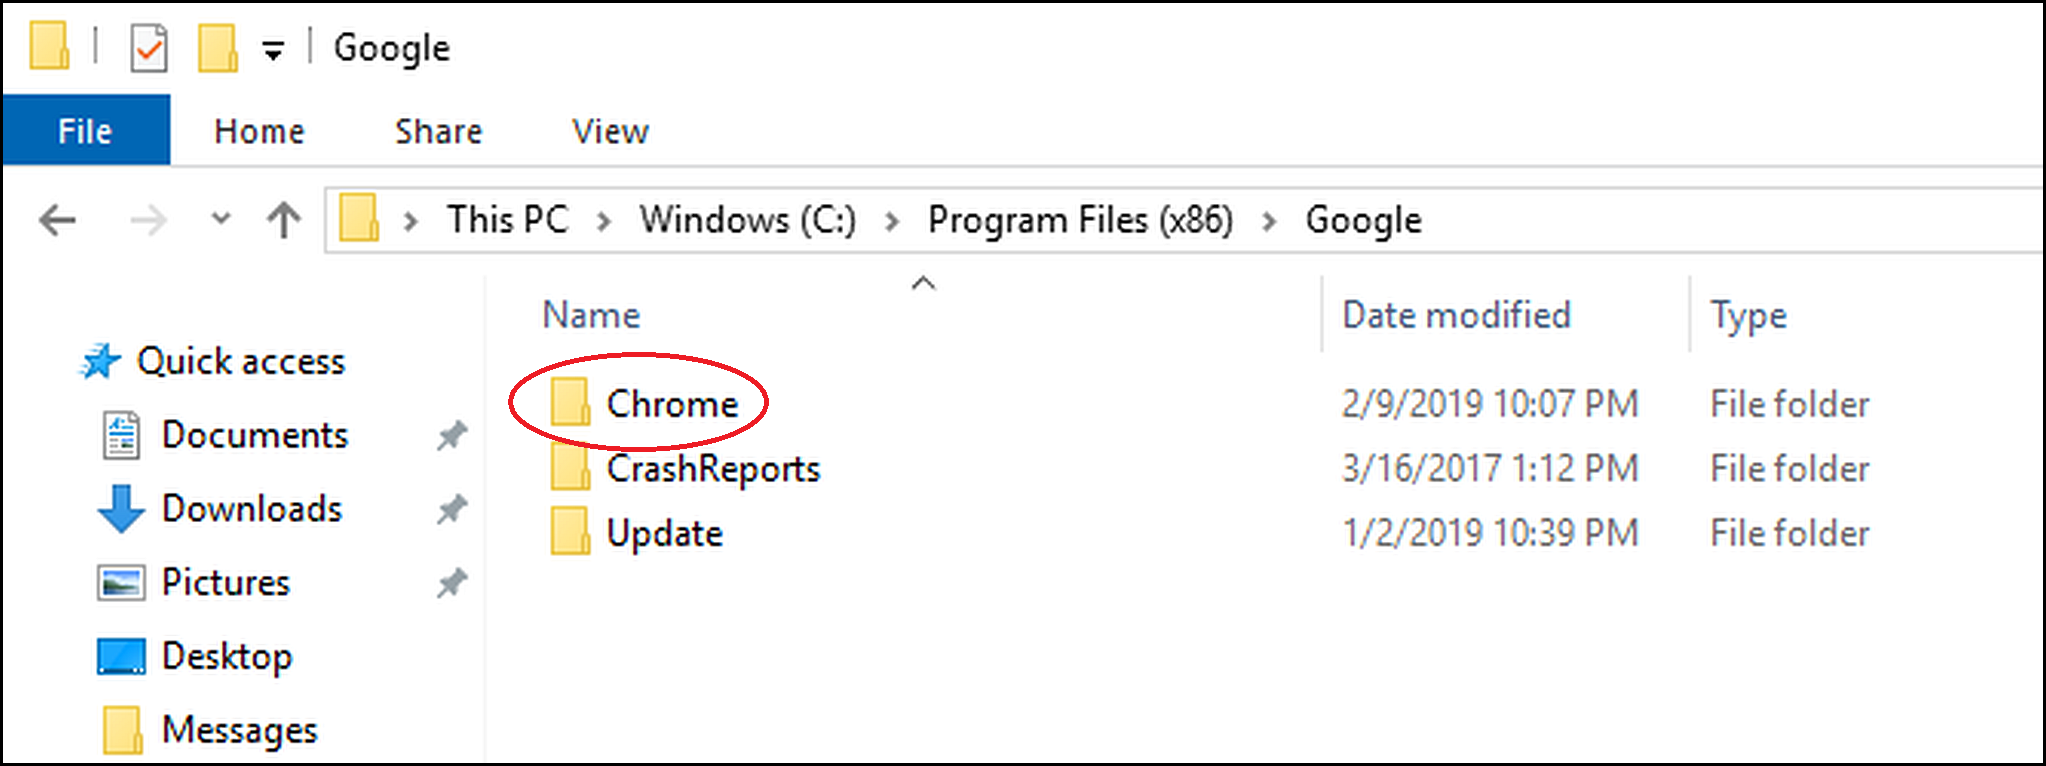
To make an offline copy of Chrome, navigate to find the Chrome install folder on your computer. For Windows it is typically in Program Files (x86) - Google:
Copy Chrome folder
Copy the Chrome folder and Web Wallet HTML file to a USB thumb drive and then copy these to the offline computer.
Make sure that your offline computer has bluetooth disabled as well as any other outside connectivity. Use an untampered wired keyboard and mouse and insure there is no one around who can see or record your monitor. After offline setup, it is good practice to keep this computer offline or wipe the hard drive, unless you are completely sure that the machine is free of malware or security risks.
This gives a copy of the current Chrome and web wallet for the offline computer, and will not get any future version updates. You can do an update with these same steps, but it should not be necessary for these basic operations.
Launch the wallet in Offline Mode
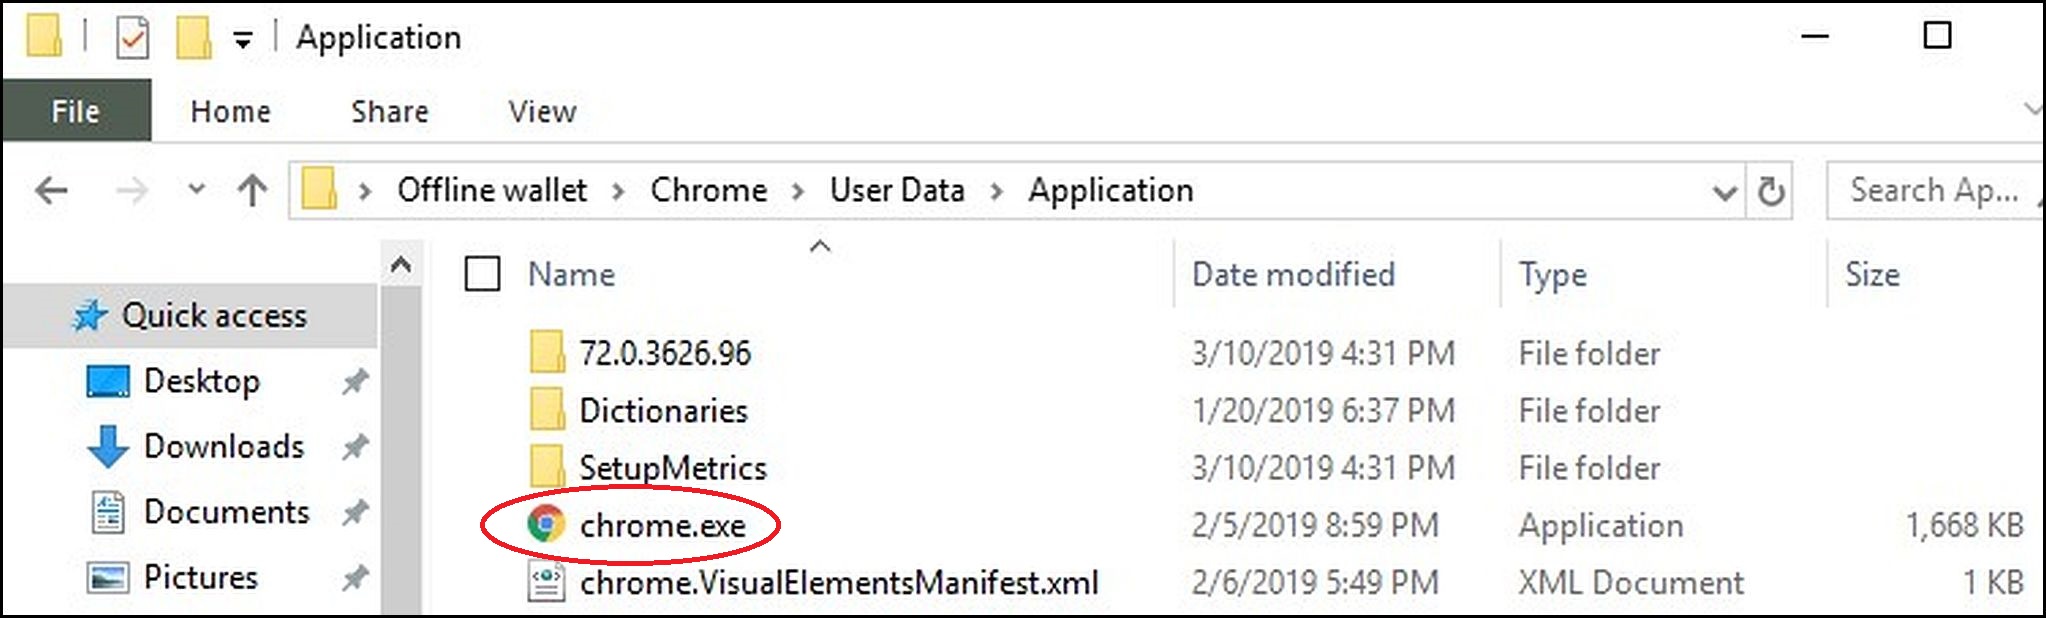
On the offline computer, launch the Chrome browser: in the copied Chrome folder select User Data - Application - Chrome.exe:
(here in a folder called "Offline wallet")
Launch the offline web wallet
With the cursor in the Chrome URL address bar press Control - "O" (for Open) and then navigate to and Open the Hydra Web Wallet.html file:

Using the web wallet menu select Settings and in the Mode dropdown select Offline and CONFIRM:

From this point, you can generate a new wallet (suggested to create from mnemonic) and save (and backup) the key file. The menu will show Request Payment and the Request Payment page will show the receiving address for the offline wallet:

Copy the receiving address to a text file and copy to the USB thumb drive for transfer to the online computer. Now you can send Hydra to this address to fund the offline wallet.
This works to send Hydra to the offline wallet address because Hydra coins are actually stored as unspent transactions on the blockchain (no coins are ever stored in any wallet itself). However the offline wallet holds the private key for its address, and only the offline wallet can sign transactions to send HYDRA from its address.
Safe Send
Now we can use the 3 transaction steps for a Safe Send.
Compose the base raw transaction with the online wallet.
From the online wallet menu select Safe Send and for step 1 fill in the addresses and amount. From Address* is the address of the offline wallet. The online wallet will query the blockchain for the "From Address" and select a previous transaction or transactions that hold sufficient Hydra for the amount being sent. Use 0.01 for the Fee unless you know how to choose lower fees.
After filling in all the fields, press CONFIRM, reenter the To Address*, press CONFIRM and CONFIRM again to create the raw transaction file:
Step 1 - creating the raw transaction

The online wallet will create a raw transaction text file, for example:
{"from":"<Hydra address>","to":"<Hydra address>","amount":"1000.0","fee":"0.01", "utxo":[{"address":"<from Hydra address>","txid":"<transaction ID>","confirmations":4, "isStake":false,"amount":10,"value":1000000000,"hash":"<hash checksum>","pos":0}]}
Here the online wallet has selected an appropriate unspent transaction owned by the "From Address" which holds 20000 Hydra.
You must leave the online wallet running at the end of step 1 while completing step 2 with the offline computer, then return for step 3. Exiting the online wallet at this point and reloading for step 3 will cancel the sequence.
Copy the raw transaction file to the offline wallet computer. For the offline wallet launch Chrome and the wallet in offline mode as in "Launch the Offline Wallet" above. Use the menu option Restore from Key File to load the previous address. The offline wallet will not know or display any balance.
On the offline wallet menu select
Safe Sendand on the Safe Send page in step 1 pressNEXTto begin step 2.
In step 2 select UPLOAD and open the raw transaction file copied from the online wallet. You will see the transaction fields as entered on the online computer. Select CONFIRM, reenter the To Address* and CONFIRM, and then CONFIRM again to create the signed tx file:
Step 2 - sign the raw transaction file to create the tx (transmission) file

The offline wallet will generate a signed tx file, for example:
{"from":"<Hydra Address>","to":"<Hydra Address>","amount":"1000.0", "fee":"0.01","rawTx":"<raw hex transaction code>"}
Copy this file to a USB thumb drive and transfer to the online wallet computer.
Note that the offline wallet is completely disconnected from the internet, and can only sign the transaction using its private keys. The offline wallet cannot even show the balance for its address, but you can see the balance with the Explorer.
Back on the online wallet (still on the Safe Send page) on step 2 select
NEXTto advance to step 3.
On step 3 select UPLOAD and open the signed tx file. You will see the transaction fields as entered in step 1. Press CONFIRM, reenter the Send To* address and select CONFIRM, and CONFIRM again to send the transaction to the network:

Step 3 - send the tx file to the network to complete the transaction
At the bottom of the screen you will see the green confirmation bar, and after the transaction is published in the next block select the Explorer link to see the transaction on the blockchain.

Last updated
Was this helpful?